
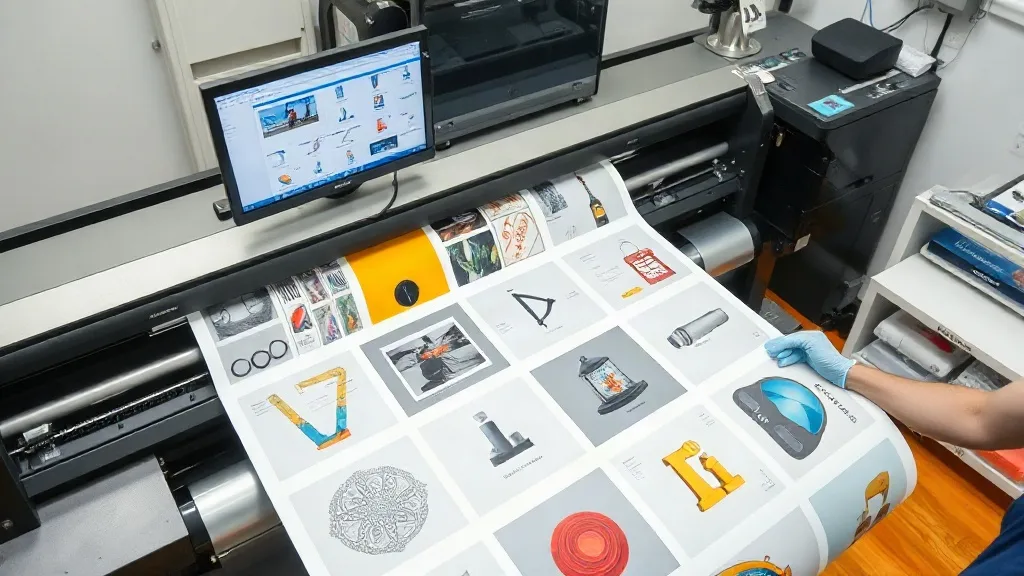
If you run a DTF printing business, you already know that film, ink, and powder add up fast. Every square inch of wasted film eats into your margin. That's where a smart DTF Gangsheet strategy comes in. It's not just about filling a sheet; it's about planning each print so you use less material, avoid reprints, and keep customers happy. In this guide, we'll walk through practical ways to make your gangsheets work harder for you, from layout decisions to order grouping and common pitfalls to avoid.
Why Your Gangsheet Layout Matters More Than You Think
When you first start out, it's tempting to hit print as soon as an order comes in. But that approach often leads to film waste and uneven production. A deliberate gangsheet layout helps you pack more designs onto a single sheet, reduce trim waste, and maintain consistent quality. The goal is to maximize the printable area without compromising the space needed for cutting and transferring.
Think of your gangsheet as a puzzle. Each design has its own shape and size, and your job is to fit them together efficiently. But it's not just about squeezing everything in. You also need to consider the direction of the film, the grain, and the way the powder will adhere. A well-organized sheet reduces the risk of wrinkles, misalignments, and color inconsistencies.
Understand Your Film's Printable Area
Before you design anything, know the exact printable width and length of your film rolls. Most DTF films come in standard widths like 13, 17, 22, or 24 inches, but the printable area is slightly smaller due to margins. If you design right to the edge, you risk cutoff prints and wasted film. Always leave a small buffer, typically 0.25 to 0.5 inches on each side, to account for printer tolerances and cutting.
Also, consider the length of your sheet. Some printers handle continuous rolls, while others use cut sheets. If you're using a roll-to-roll system, you can create longer gangsheets, but you need to ensure the film doesn't shift during printing. A longer sheet means more designs per run, but it also requires careful tension control.
Group Similar Jobs for Consistency
Grouping similar jobs on the same sheet isn't just about efficiency; it's about consistency. When you print designs with similar ink coverage and color profiles together, you reduce the need to adjust settings mid-run. For example, if you have several orders that are mostly dark colors, print them together. Then switch to lighter designs. This minimizes ink switching and cleaning, which saves time and reduces waste.
Also, consider the powder application. Designs with similar powder requirements can be processed together. If you have a mix of fine details and large solid areas, you might need different powder shaking settings. Grouping by complexity helps you maintain quality without constant tweaking.
How to Plan a Gangsheet That Saves Film and Time
Planning is everything. A few extra minutes in your design software can save you meters of film and hours of rework. Here's a step-by-step approach to building a gangsheet that's both efficient and reliable.
Step 1: Collect and Prioritize Orders
Start by gathering all pending orders. Prioritize by due date, but also consider design complexity. Simple designs can be nested tightly, while complex ones with fine details may need more breathing room. Create a list and sort by size and color profile.
Step 2: Use Nesting Software Wisely
Nesting software can automatically arrange designs to minimize waste, but it's not foolproof. Always review the layout. Check for adequate spacing between designs (at least 0.2 inches) to allow for cutting and to prevent ink from bleeding between images. Also, ensure that the software respects the grain direction if your film has one.
Step 3: Leave Room for Cut Lines and Registration Marks
If you're using a cutting plotter, you'll need registration marks or cut lines. These take up space, so factor them into your layout. A common mistake is to fill the sheet so tightly that there's no room for the cutter to register. Leave at least 0.5 inches at the top and bottom for marks.
Step 4: Test with a Small Batch First
Before committing to a full sheet, print a small test strip with a few designs. This helps you catch color issues, banding, or powder problems early. It's better to waste a few inches than a whole sheet.
Common Gangsheet Mistakes That Cost You Money
Even experienced operators fall into traps. Here are the most common ones and how to avoid them.
- Overcrowding: Trying to fit too many designs without enough spacing leads to cutting errors and ink smudging.
- Ignoring color profiles: Mixing RGB and CMYK designs on one sheet can cause inconsistent colors. Convert all to the same profile before nesting.
- Forgetting about powder: Some designs require more powder for opacity. If you group them with designs that need less, you might over-powder the latter, causing a rough feel.
- Not accounting for shrinkage: Film can shrink slightly during printing and curing. Leave a little extra space around designs to compensate.
Each of these mistakes can lead to reprints, which waste film, ink, and time. A little planning goes a long way.
Maximizing Profit with Smart Gangsheet Strategies
Your gangsheet is a direct reflection of your shop's efficiency. By optimizing layouts, you reduce waste and increase throughput. But there's more to profit than just film savings. Consider these strategies:
- Batch similar colors: Printing multiple jobs with the same color profile reduces ink changes and cleaning cycles.
- Use offcuts for small jobs: Leftover film from large sheets can be used for small orders like names or logos. Keep a bin of usable scraps.
- Standardize sheet sizes: If you often print the same size sheets, you can pre-set your printer and nesting software, saving setup time.
- Track your waste: Keep a log of film used versus film wasted. Identify patterns and adjust your nesting accordingly.
These small changes add up. A shop that consistently uses 10% less film can see a significant boost in annual profit.
Frequently Asked Questions About DTF Gangsheets
What is the ideal spacing between designs on a DTF gangsheet?
A minimum of 0.2 inches (about 5 mm) is recommended to allow for cutting and to prevent ink from bleeding between designs. For designs with heavy ink coverage, increase to 0.3 inches.
Can I mix different fabric types on one gangsheet?
Yes, the gangsheet itself is just a printing layout. However, you should consider the end use. If you're printing for different fabric types (e.g., cotton vs. polyester), you might need to adjust powder and curing settings later. Grouping by fabric type can help streamline post-processing.
How do I handle color consistency across a large gangsheet?
Ensure all designs are in the same color profile (usually CMYK for DTF). Also, print a color test strip at the beginning of each sheet to check for consistency. If you notice variations, recalibrate your printer or adjust the profile.
What's the best way to store unused film from a gangsheet?
Store unused film in a cool, dry place, away from direct sunlight. Keep it rolled or flat to prevent creases. Use it for small jobs within a few weeks, as film can attract dust over time.
How can I reduce powder waste when using gangsheets?
Use a powder shaker with a fine mesh and apply evenly. Shake off excess powder back into the container. Also, group designs with similar powder requirements to avoid over-powdering.
Running a DTF shop is a constant balancing act, but with a thoughtful approach to gangsheet planning, you can cut waste, speed up production, and keep your customers coming back. Start with small changes, track your results, and refine your process over time. Your bottom line will thank you.